
Maple cardamom apple galette
- Total Time: 1 hour 5 minutes
- Yield: 4-6 1x
Description
A cardamom-spiced apple galette, perfect for your holiday table. If pies intimidate you, this is your recipe!
Ingredients
- 1 ¼ cups flour
- 2 teaspoons sugar
- ½ teaspoon salt
- 8 tablespoons (1 stick) COLD unsalted butter
- 6 tablespoons ice water
- 2 large apples, peeled and thinly sliced (I used honeycrisp)
- 3 tablespoons maple syrup
- ½ teaspoon ground cinnamon
- 1 teaspoon ground cardamom
- 2 teaspoons flour
- 2 tablespoons sour cream
- ½ teaspoon vanilla bean paste (optional)
- 1 tablespoon melted butter
- 1 tablespoon demerara sugar
Instructions
- Add flour, sugar and salt to a large bowl and whisk to combine.
- Using a box grater, shred/grate butter directly into flour. Butter doesn't need to be frozen, but make sure it's straight out of the fridge. Stick bowl in freezer for 10 minutes.
- After 10 minutes, remove bowl and immediately use your fingers to break up the butter into the flour, smooshing (technical term) until butter is the size of small peas.
- Add 3 tablespoons of water and mix to combine until dough comes together into a shaggy mess. Add more water 1 tablespoon at a time until everything comes together.
- Dump dough onto a floured surface and knead until it becomes a more cohesive dough. Wrap in plastic wrap and let sit in the fridge for at least an hour, and up to overnight.
- Preheat oven to 375. Line a large baking sheet with parchment paper.
- In a large bowl, combine apples, maple syrup, cinnamon, cardamom and flour. Toss well to combine. Add sour cream and vanilla (if using) and mix to fully coat apples. Set aside while you roll out dough.
- Take dough from fridge and set on a lightly floured workspace. Roll out to a 12-14 inch circle-thing (basically don't worry about it being a perfect circle), turning the dough 90 degrees after every few rolls. Carefully transfer dough to baking sheet.
- Arrange apples on dough, leaving a 2-inch border around the edge. Gently fold that edge of dough up over the apples around the entire galette.
- Brush dough with melted butter, drizzling the rest over the apples. Sprinkle dough with sugar.
- Bake for 35-45 minutes, until apples are soft and crust is deeply brown. Ovens vary, so check often to see how it is doing.
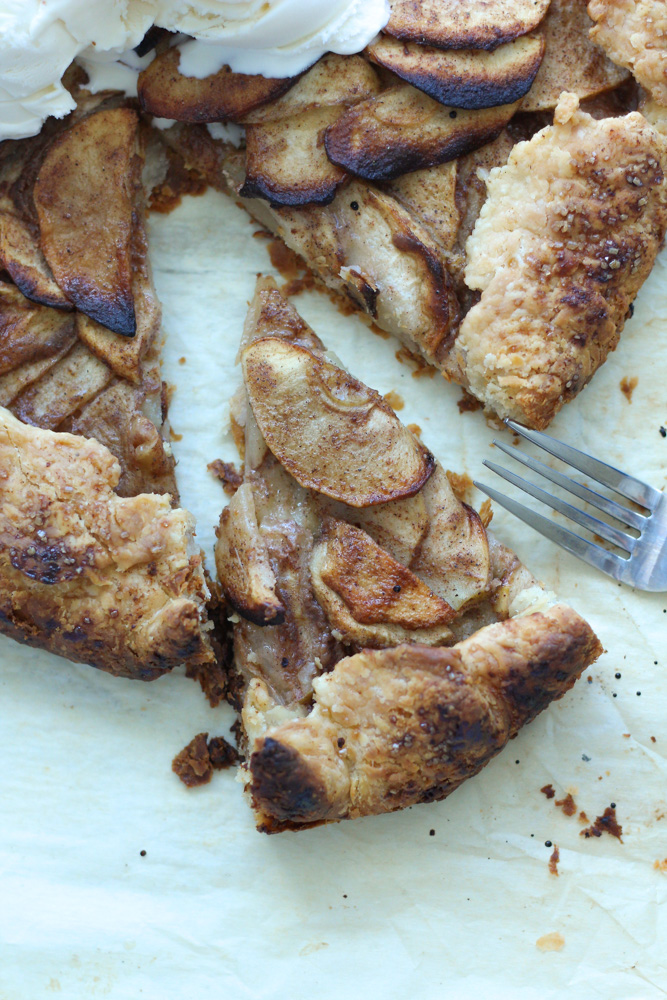
- Serve warm or at room temperature, with or without (or with) ice cream and/or whipped cream.
Recipe inspired and adapted from A Cozy Kitchen.
Notes
Store bought dough is perfect for this. Just get the kind rolled up in the package (as opposed to one in a pie tin, you know?) and keep in the fridge until you're ready to roll.
You can use any type of apple you want, but I HIGHLY suggest either honeycrisp, pink lady, fuji or green apples (or a mix!). If using green, add a little extra maple syrup to offset the tarteness.
- Prep Time: 20 minutes (not counting chilling time)
- Cook Time: 45 minutes
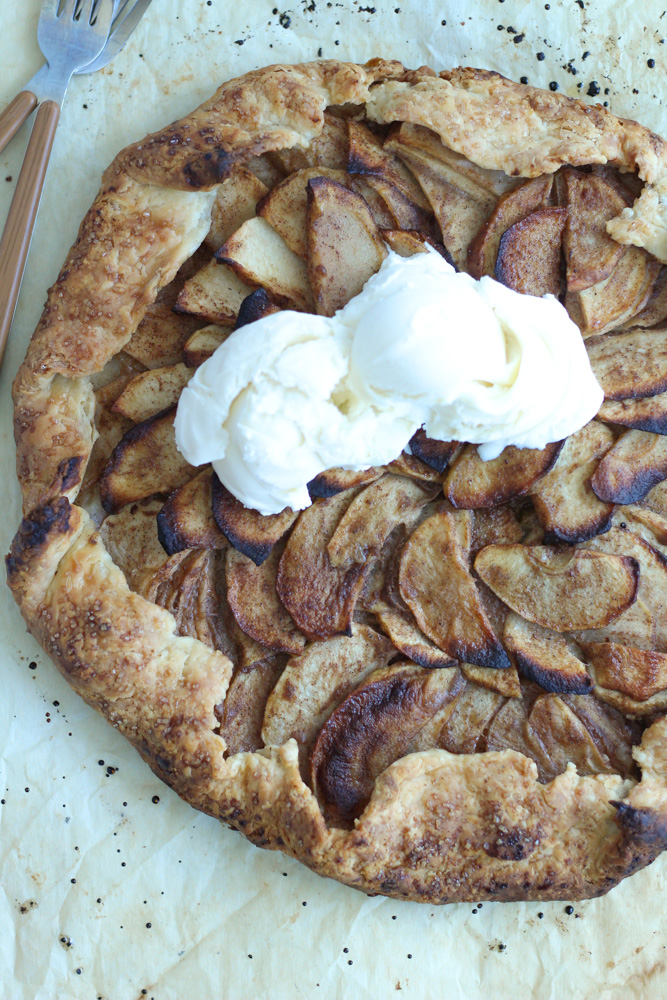
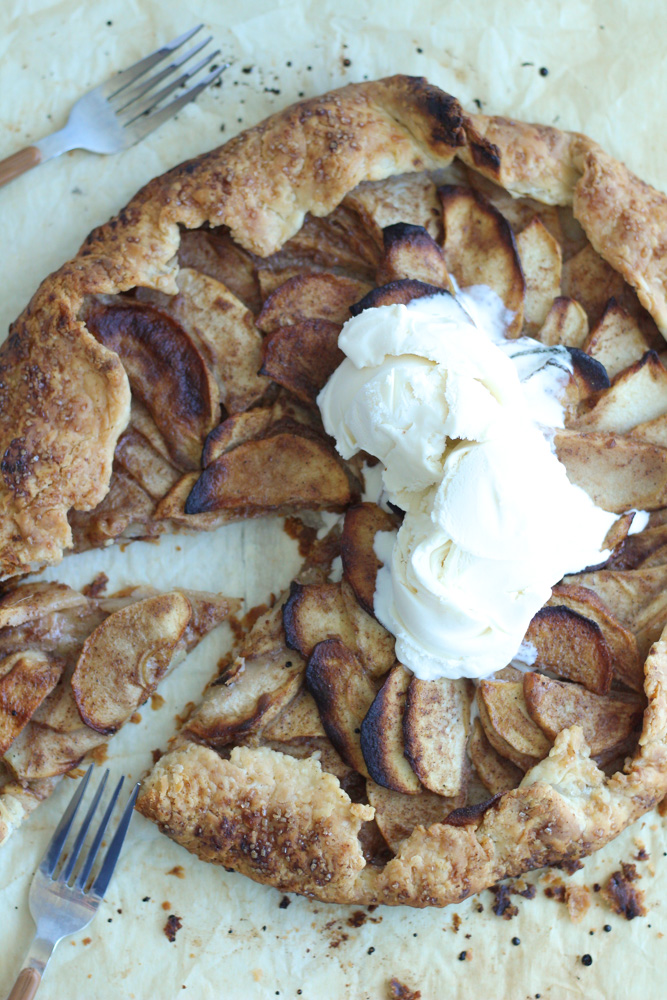
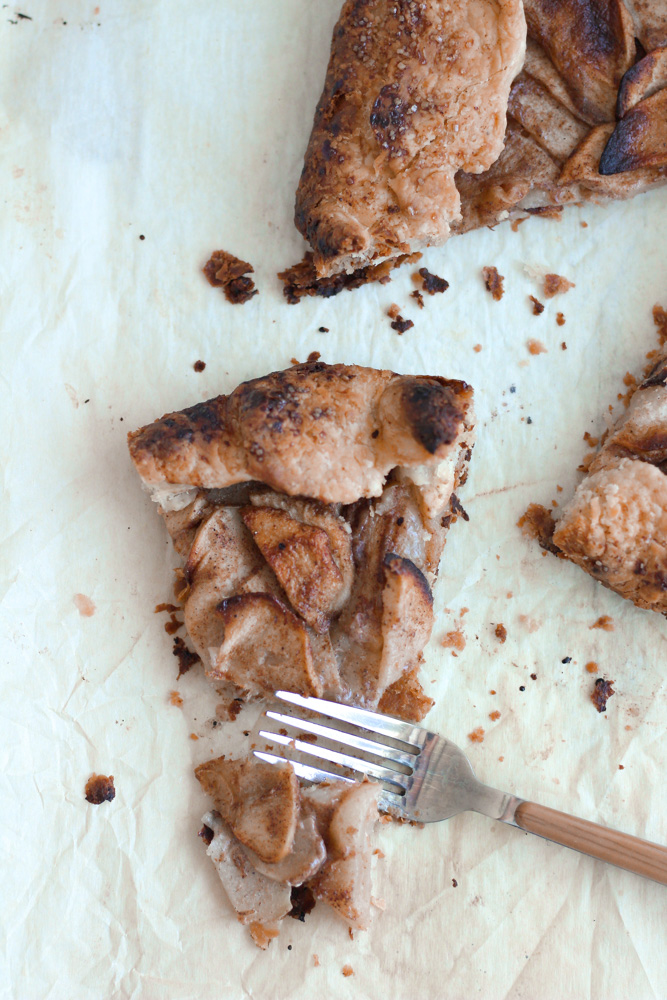
Fully aware that this galette looks a little burned, but I am choosing to still share it because it is DELICIOUS. Further proof that a little extra time in the oven is sometimes the answer.
If you've been around for a while, you know making pies does not come naturally to me. I try every year around Thanksgiving, and 9 times out of 10 I fail. I don't know why either! I feel like I do everything right, but it's just not in the stars for me to bake a successful pie.
Womp womp.
But it's okay! Because we can make galettes, and they are wonderful! It's basically half a pie, right? Yes. Let's go with that.
Ironically enough, I based this recipe on A Cozy Kitchen's homemade apple pie. Just halved the dough part, and then added maple and cardamom to the filling. Adding a little sour cream to the apples creates a sort of caramel sauce thing, which is absolutely amazing.
What I love the most about galettes is that they really, truly do not have to be pretty. The more rustic the better! And this one here is REAL rustic. The thing about galettes (and pies, actually) is that you want the crust to be perfectly crispy and not at all soggy, so take it as far as you need to in the oven to ensure it's perfectly baked through. If you don't want your apples to burn (I get it), take a little foil and use that to cover up just the filling.
But! Can I just say? The apples didn't taste burnt and everything about this was perfect.
Galettes forever!


Comments
No Comments