
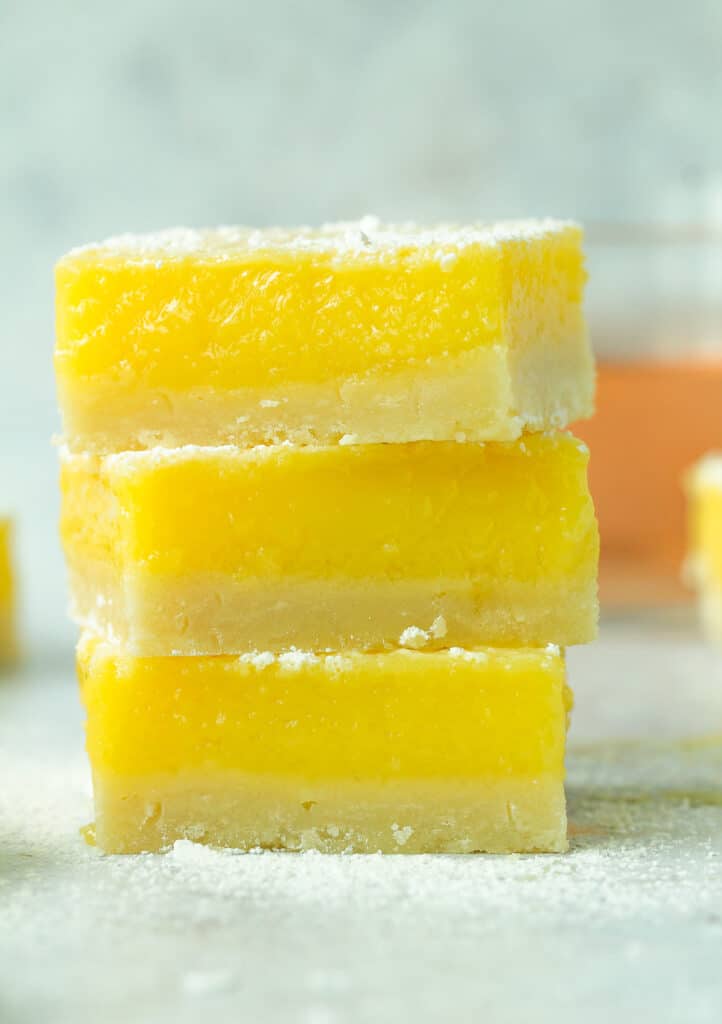
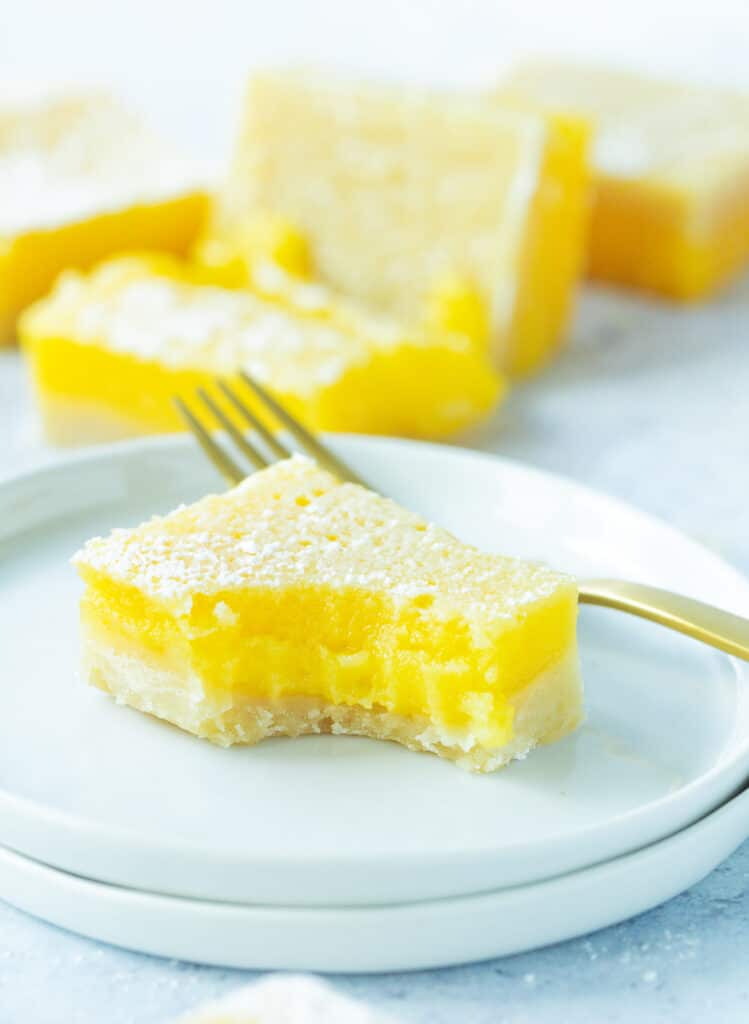
If you love rosé wine and you love a classic lemon bar then you'll LOVE these lemon rosé bars! A sweet, buttery crust topped with a perfectly tart, lemony and slightly floral filling. This is such a great summer dessert!

Lemon Rosé Bars
- Total Time: 45 minutes
- Yield: 9x9 pan 1x
Description
If you love rosé wine and you love a classic lemon bar then you'll LOVE these lemon rosé bars! A sweet, buttery crust topped with a perfectly tart, lemony and slightly floral filling. This is such a great summer dessert!
Ingredients
- 8 tablespoons (1 stick) unsalted butter, melted
- 1 ¾ cups sugar, divided
- 1 teaspoon vanilla
- ¼ teaspoon salt
- 2 ¼ cups flour, divided
- 4 eggs
- 6 tablespoons fresh lemon juice
- 6 tablespoons rosé wine
- Zest from 1 lemon (optional)
- Powdered sugar, for serving
Instructions
- Preheat oven to 325.
- In a large bowl, add 8 tablespoons (1 stick) melted butter, ¼ cup sugar, 1 teaspoon vanilla and ¼ teaspoon salt. Mix well until combined. Add 2 cups flour and stir until everything comes together and you have a soft dough. Press dough into a buttered or parchment-lined 9x9 pan in a single layer.
- Bake for 16 minutes or until the edges start to turn light brown. As soon as you take the pan out of the oven, use a fork to poke holes all over the crust (but don't go all the way through to the bottom of the pan!).
- While the crust bakes, make the filling by whisking together 4 eggs, 6 tablespoons lemon juice, 6 tablespoons rosé and lemon zest (if using). Sift in 1 ½ cups sugar and ¼ cup flour and mix to combine.
- Pour filling over warm crust. Place pan back in oven and bake for 20 minutes or until center is set. The pan might still be a little jiggly, but use the center as a guide.
- Let bars cool completely before serving. Dust a little powdered sugar on top, if desired.
- Store leftover lemon rosé bars in the fridge for 5-7 days. They can also be frozen easily - place cut bars on a baking sheet and freeze for at least 1 hour. Individually wrap each frozen bar in plastic wrap or parchment paper and then store them all in a large bag or container.
Recipe adapted from Sally's Baking Addiction
Notes
- It should go without saying, but if you are just looking for a great classic lemon bar recipe you can use this and just replace the rosé with more lemon juice! You can also mix and match the amounts of each, as long as you get ¾ cup at the end (i.e. you could do ½ cup lemon juice + ¼ cup rosé if you want).
- Prep Time: 10 minutes
- Cook Time: 35 minutes
- Category: Dessert
Oh yea, we're pouring rosé into our dessert. I mean, OF COURSE we are.
Lemon + rosé are a total match made in heaven, so this was almost a no-brainer for me. I love lemon bars so it was only a matter of time before we added rosé to the mix.
These lemon rosé bars are SO easy to pull together. The buttery shortbread crust mixes up in just a few minutes (no mixer needed!), and the lemon rosé filling is whisked together while the crust does a little pre-baking. Honestly, the hardest part is waiting for these babies to cool...but please do for the best eating experience.
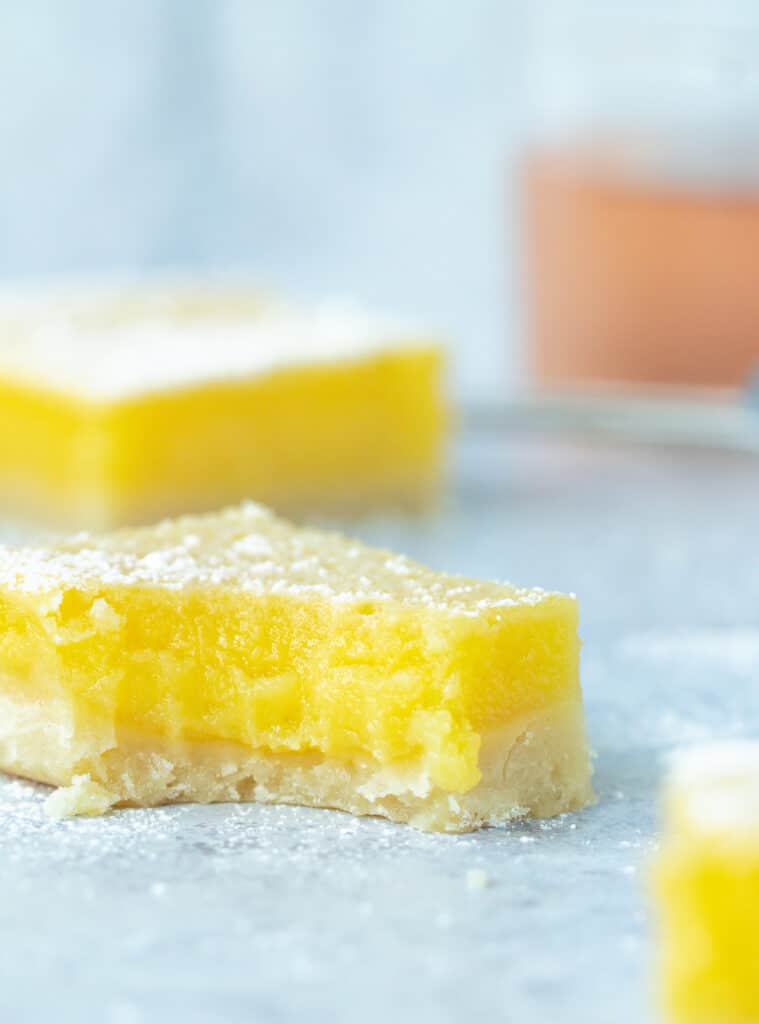
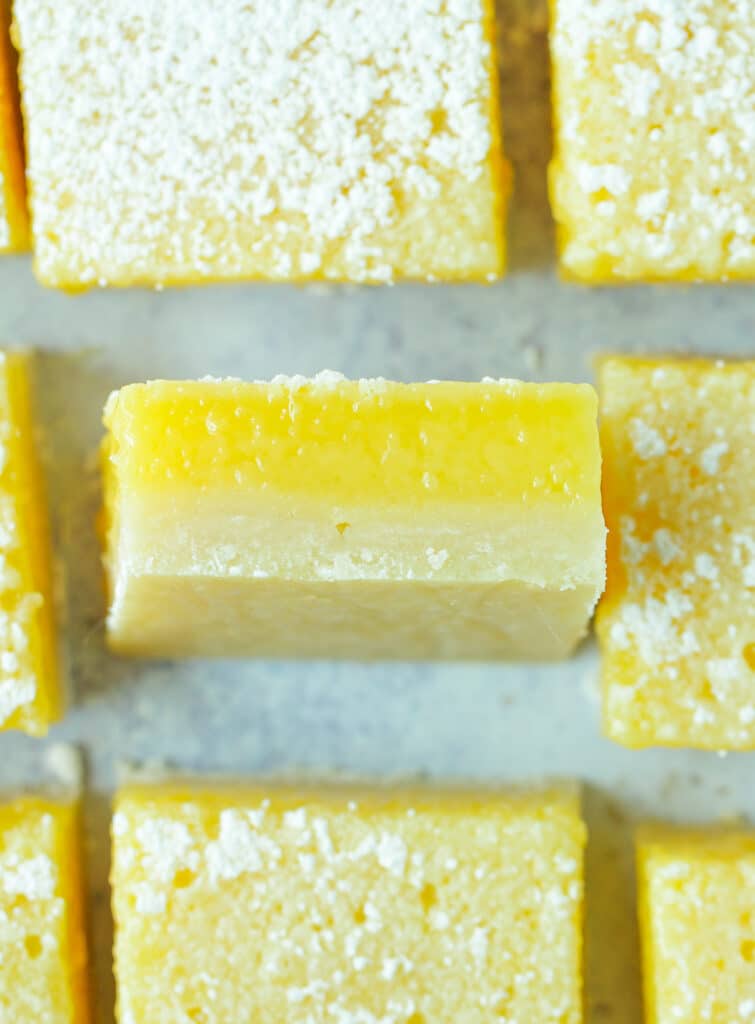
I mean, just look at that perfect texture!!
You don't need me to give you the history of lemon bars here, so let's just get into it...
What you'll need
Butter: The base of these bars is a perfect, buttery shortbread-style crust. So, yea you need butter. The best part is that you'll start with melted butter, so no need to plan ahead and soften.
Sugar: For both the shortbread crust and lemon rosé filling. If you prefer a super tart lemon bar, you can cut down on the sugar a bit but I wouldn't go below 1 ¼ cups to ensure it doesn't mess with the integrity and structure of the finished bar.
Vanilla: Shortbread needs vanilla!
Flour: Also for the shortbread crust and filling. A tiny bit of flour in the filling helps it set up perfectly in the oven.
Eggs: Some lemon bar recipes will have you use just yolks, or a mix of whole eggs and yolks. But I've found recipes that use the whole egg are just perfect, so no need to separate here.
Lemon: Obviously you need lemon juice for these bars. I also like to add in some lemon zest while I'm at it because it just adds more delicious lemon flavor, but that's totally optional. If you're into the idea, the zest from one lemon is enough.
Rosé: I like to use a slightly sweeter rosé to balance the lemon flavor, but a dry rosé works well too. As you play with this recipe, you may find you want more or less rosé. Feel free to tweak the amounts of the wine and lemon juice to your liking - just make sure it all adds up to ¾ cup!
Making Rosé Lemon bars
It's as easy as 1 (make the shortbread crust!), 2 (make lemon rosé filling!), 3 (bake!):
Make crust
Mix your melted butter with some of the sugar, some of the flour, vanilla and salt. It'll come together really quickly and form a thick, pliable dough. Press that into a lined baking 9x9 or 8x8 pan and bake just until the edges start to turn light brown. Remove from oven and then immediately poke some holes into the crust (don't go all the way through!). Set aside.
Make lemon rosé filling
While your crust bakes, whisk together your eggs with rosé,, lemon juice and lemon zest (if using). Add the remaining sugar and flour (I highly suggest sifting these in to ensure no lumps, but it's not completely necessary). Whisk well to combine.
Combine it all together
Pour your filling on the warm crust and throw that pan back in the oven for another 20 minutes, or until the center is set. A little jiggle on the top is okay, but use the center as a guide - it should look like it has set completely. Let these lemon rosé bars cool completely before serving. I like to actually keep them in the fridge for at least an hour before I make the first cut.
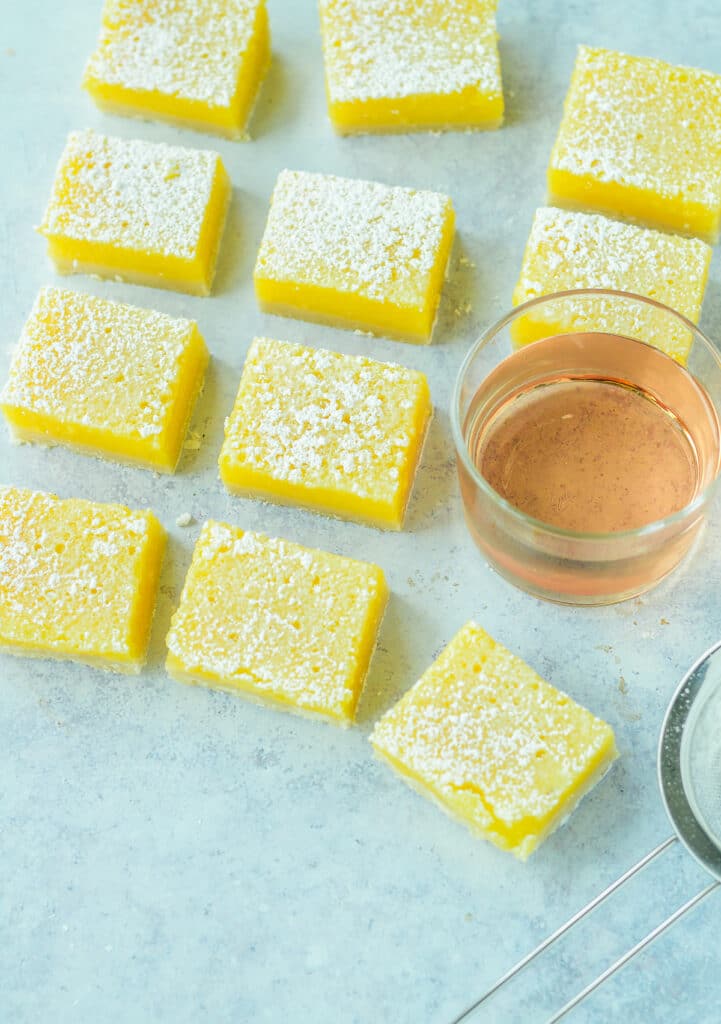
Slice and enjoy!
Cut and sprinkle with powdered sugar, if desired.
Super into bar desserts?
I've got a few more for ya!
- Brown butter cherry bars
- Bourbon caramel swirled chocolate chunk bars
- Salted tahini chocolate chunk blondies
- Berry coconut crumble bars
And if you're in the mood for more rosé desserts...
- Lavender white chocolate shortbread cookies with rosé glaze
- Lemon rosé loaf cake
- Raspberry rosé cupcakes
- Creamy coconut rosé popsicles


Comments
No Comments